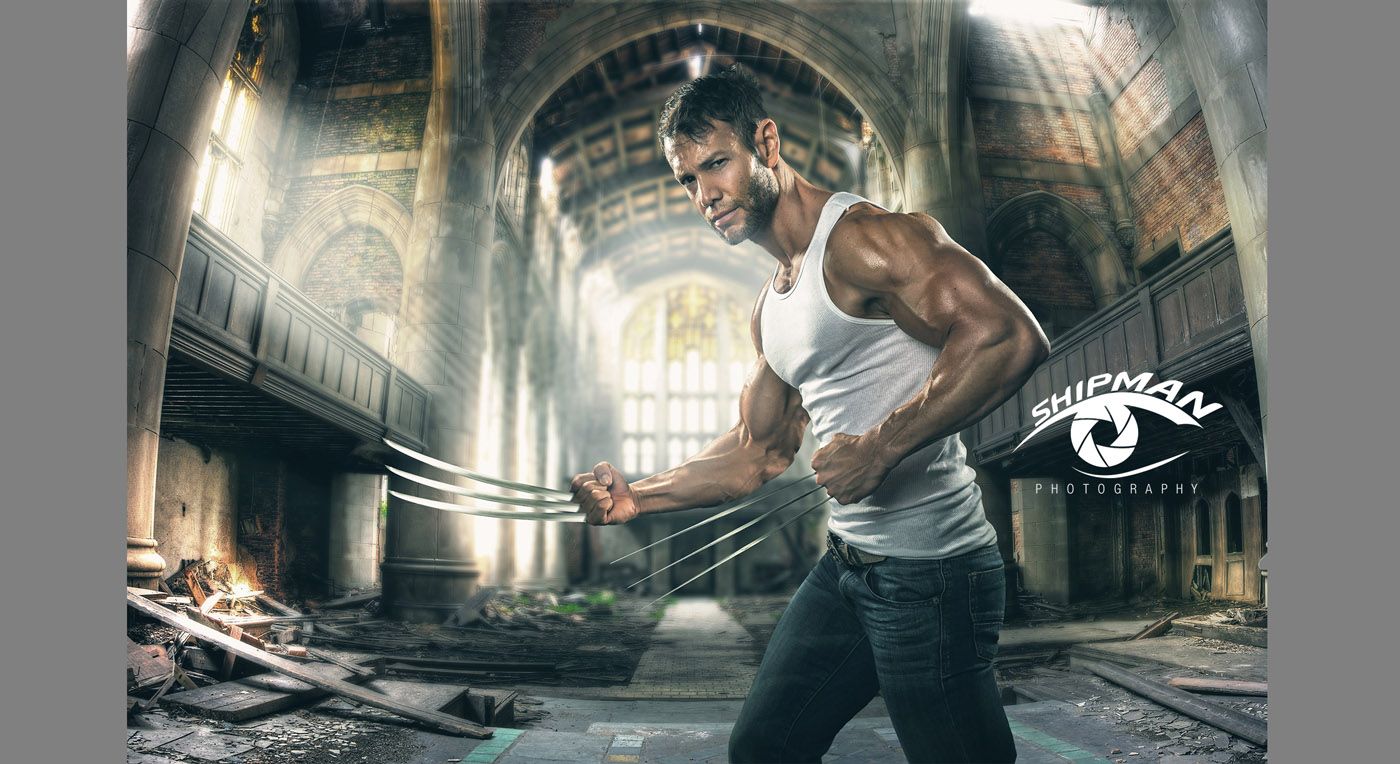
Composite photography images; where photography and graphic design meet.
One of our passions and specialties is composite photography. What is a composite image? A quick google search finds this definition:
A composite Image is a “picture that is made from the combination of multiple images merged into a single surface. This technique often generates interesting and weird surreal effects.”
“Weird” aside, interesting and purposely surreal can and should be frequent elements of good composite photography. The great thing about composite photography is that it enables the artist to create exactly what they imagine for a finished image without being limited by location, reality, gravity etc.
Practically speaking, a composite image is an extremely Photoshop-heavy project. Photoshop is more of a graphic design program than a basic photo editing program. In fact there are plenty of pro photographers who do great work who if they ever use Photoshop, use only a tiny fraction of it’s immense capabilities. For many photographers, the idea of spending 10 hours editing a single final image is their working definition of Hell. The composite artist is equal parts photographer and designer and is a pretty unique breed of both.
How Do I Learn To Do Composite Photography?
With this art form’s ability to create stunning and captivating images, it’s no wonder however that many photographers give it a try. There is an amazing amount of self-education available on composite imaging online, and YouTube sites like PHLEARN provide incredibly helpful videos that help artists harness the power of Photoshop. If this is an art form that interests you, I would recommend starting there.
Here is my checklist for things to consider and understand when you are looking to create a composite.
- Have a fully formed idea of your final image before you start shooting. Even take the time to sketch out a storyboard of the final composition. This really helps as you look for composite elements or shoot them by knowing how they relate to each other in terms of placement and perspective.
- Do not use found art on the internet even if it says it is for public use. Public use often is legally limited in terms of how you can use it commercially and some contests will require you use only licensed downloads in combination with original photography for your pieces. Adobe Stock is a great service for quality licensed downloads to fit almost any idea you have.
- Make sure your elements work together. I will produce some instructional videos soon on the nuts and bolts of this, but the three things to remember and pay attention to are:
- Perspective – a subject shot at an angle that doesn’t fit your composite background or any elements you introduce to it will look off to the viewer. This takes a developed and skilled eye and will improve over time.
- Lighting – make sure you’ve lit your subject in a light that fits the background scene you are putting them in. If there is a light source in the background, there needs to be some level of backlight on your subject.
- Color Grading & Blending – your subject also needs to look like they are lit by the same light temperatures and exhibit the same shadowing color notes that the background does. I have a detailed checklist for this but the rule of thumb is to blend colors specific to your subject until it passes the eye test and then put a couple of subtle filters over the top of the whole finished scene that affect both the subject and background along with any other elements. It helps sell the lie – as famous commercial photographer Joel Grimes says.
Check out more of our composite photography!

We at Shipman Photos have made this one of our specialties, utilizing composite techniques to create everything from custom senior portraits to functionally modular corporate team photos to athletic posters to highly produced national advertising campaign quality cinematic scenes. Our proprietary brand name for this commercial photography inspired style is “Shipman Cinematics” and HERE is a link to our portfolio.

